It's that time of year again. Regardless of your preferred Holiday most love to decorate and celebrate around this time. For a lot of us the Holidays mean a tighter budget. However, it just means you can get creative. I thought I'd share my quick creativeness with you, two ideas you can re-create or take inspiration from. One is Bunting and the other is a Christmas Tree.
The things you'll need should be in most households. A Book, Cardboard, Scissors, Floss, Skewers and a Pencil.
Christmas Tree Bunting
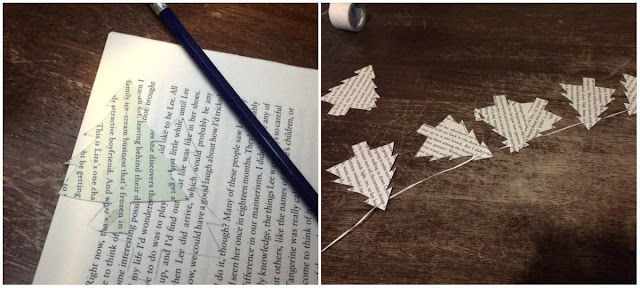
Step 1) You can utilise the cover and back of the book for a stencil as it's a sturdier material than the paper itself. You'll need this as it makes it easier to transfer the design you want on the paper over and over again. I chose a tree but you can choose what you'd like.
Step 2) Now you can start to tear sections out of the book. The book I chose was quite large and I could stencil 3 trees on a page so I chose to do 6 pages at a time. The thicker the section the harder it is to cut out the shape. So keep that in mind. Around 25 trees is enough length wise to string over a door frame. I penciled the shape using my stencil and started cutting. It can take awhile though. Depending on how many surfaces or doors you want to bunt.
Step 3) Another time consuming process is stringing the trees onto the floss. I used a pin to poke holes in the tops of my trees but any sharp small object will do. Once you've strung enough on, cut your floss and a hang it where you please. A small amount of tape will suffice for this step, the bunting isn't very heavy. I also used trees to cover each end of my floss, this is optional however.
Paper Christmas Tree
Step 1) Now I've been experimental with my bases but wedging the bottom of the skewer into a couple of squares of cardboard seems as sturdy as anything. As for the squares of paper I cut them to size as I went. It's all up to you how big or small you want to go with your sizing. Obviously you want to start with big squares and go smaller as you go up.
Step 2) Once you've assembled your base and cut a bunch of sections to begin with you can start to skewer your paper, aligning the corners to form points outwards as you go.
Step 3) To give variation and height as you go up I cut mini square sections and skewered them as I went. This will help give your tree height as you go without exhausting so much time and paper.
Step 4) Tree topping. I used seashells or the top of my Katy Perry Perfume bottle to top my trees. You can use whatever your heart desires.
Happy Crafting!
If you've taken inspo from this post and make something do post it and hashtag #gidgetcooper or @gidgetcooper for me, I'd love to see!
Gidget xx


0 comments:
Post a Comment